WristMotion® Hemiarthroplasty System
WristMotion® Hemiarthroplasty System


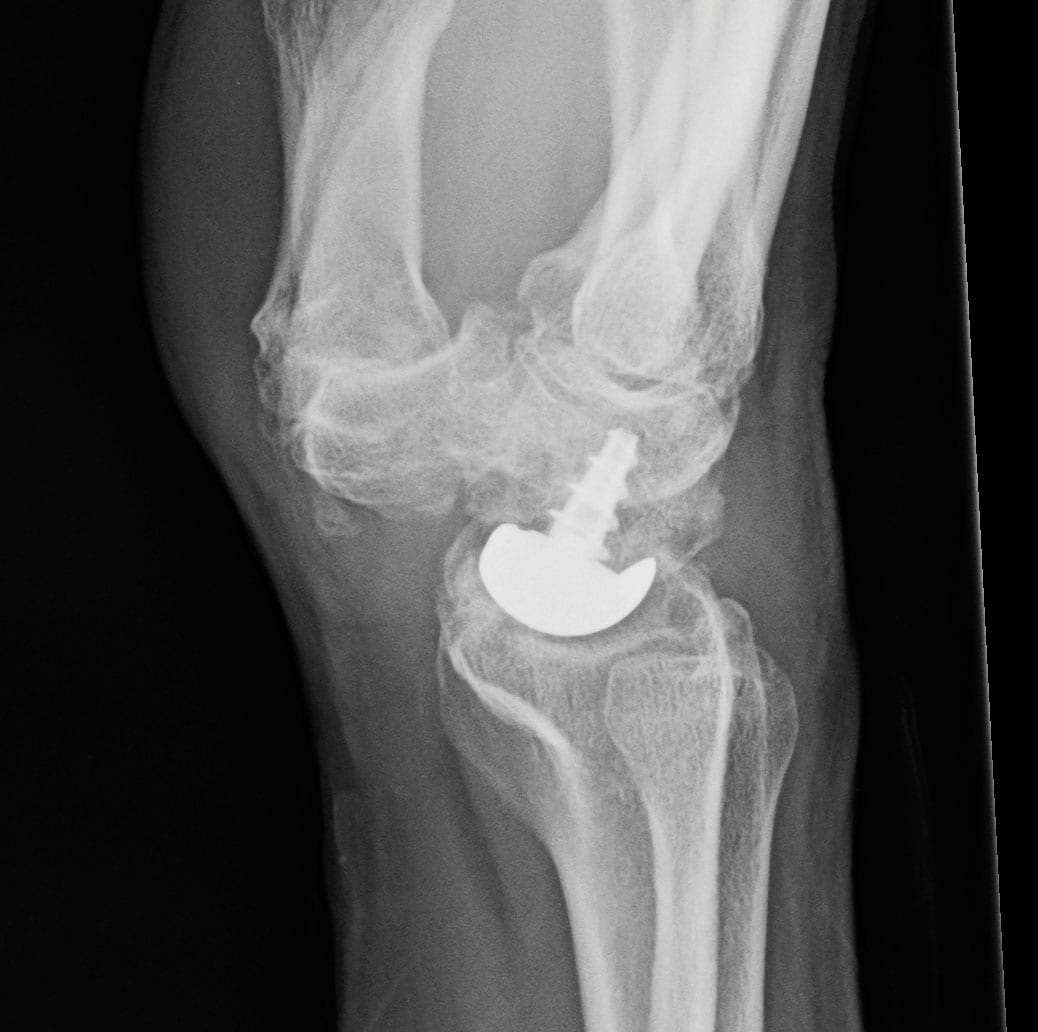
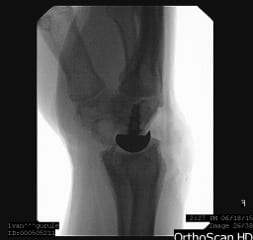
The WristMotion® Hemiarthroplasty System restores mobility and maintains native biomechanics using a dual curved WristMotion® implant that locks into a taper post for strong fixation. preparing the implant site.The implant is designed to articulate with the natural radius bone and references the curvature of the lunate fossa. The system also consists of a set of precision instruments for mapping and preparing the implant site.
- 6 implant sizes & curvatures with ultra-smooth surfaces for improved volar & dorsal flexion
- Converts a complex carpal joint into a simple, smooth radiocarpal articulating hinge
- Replacing the capitate surface expands the Proximal Row Carpectomy’s indications to provide alternatives to fusions
- Inlay design matches the native anatomy & optimizes stability
- Tapered Screw & Morse Taper Interlock for proven Rock-Solid Fixation
- Ti Plasma Spray undercoating provides excellent implant fixation characteristics
- WristMotion® system references the native anatomy of the lunate fossa to prescribe the ideal implant curvature
- Two Diameters and multiple curvature options allow an off-the-shelf custom fit into a single modular taper post
- Minimal Hardware implanted into a single bone creates a reproducible and technically simple procedure that does not require the fusing of adjacent bones
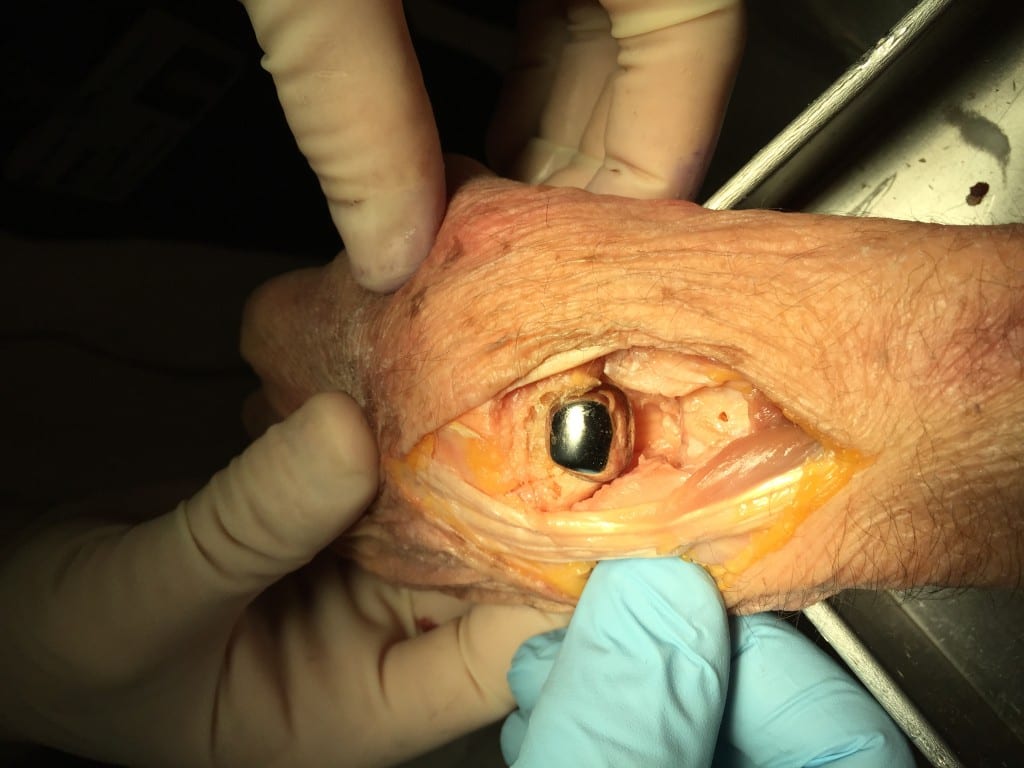
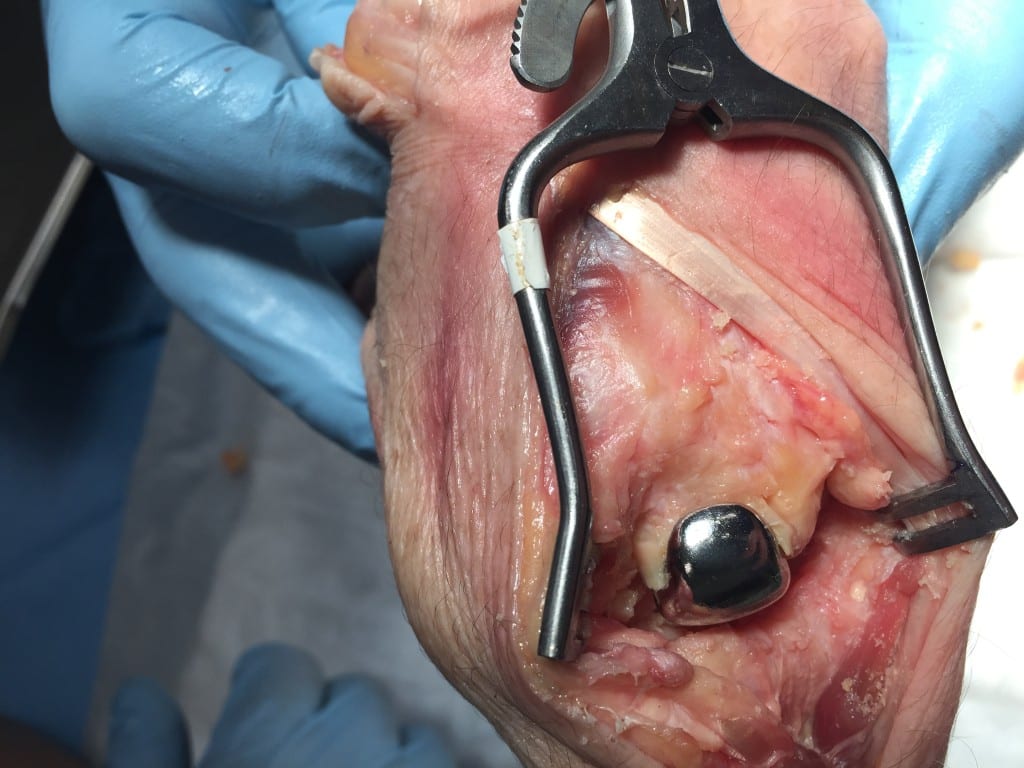
 The WristMotion® implant system is comprised of two parts; an articular cap and a fixation component (screw). Instruments are organized in the order of surgery, proceeding from left to right and top to bottom. After exposing the joint, a proximal row carpectomy (PRC) is performed. Once the PRC is complete, templates are placed on the lunate fossa to determine the curvature in both planes. When the lunate fossa curvatures are identified, the appropriate WristMotion® replacement implant is chosen. The WristMotion® procedure begins by using a guide to identify the size of the capitate head. Next, a guide wire is driven through the guide and into the capitate bone so it is perpendicular to the head. A step drill is then driven over the guidewire to a fixed level. This prepares the bone tunnel for screw placement. Before putting in the screw, the tunnel is tapped. The screw component is then advanced into the tunnel until the etch line and the screwdriver is even with the surface. If additional joint space is required, decompression can be achieved by advancing the screw 2-4mm. Mapping instruments are then inserted into the screw and used to measure the contours of the patient’s native bone surface by using the fixation component as a central axis to define the appropriate reamer. The appropriate Reamer is then placed over a guide-wire which is inserted into the screw. Advance the reamer until it hits the screw, creating the distal socket for the implant. Next, a volar reamer is inserted into the screw to ream the volar socket. Once the sockets are reamed, a trial is placed into the surface to assess proper implant fit. When the surface preparation is complete, the definitive WristMotion® implant is positioned and seated into the reamed area with several taps of the mallet.
- HemiCAP® technology was designed so patients can continue working and maintain an active lifestyle without compromising future treatments
- May be performed on an outpatient basis
- Allows for preservation of bone, soft tissues and surrounding structures
- Bridges the gap between biological therapies and joint fusion
- Patients can return to activity more rapidly for both work and exercise
- Proven Rock-Solid Fixation (data on file at Arthrosurface)
- TheWristMotion® procedure is intuitive and easy to learn
- The minimally invasive outpatient procedure typically takes less than an hour
- Skeletal anatomy and bone stock are preserved allowing future fusion or total wrist
- The two components are connected together via morse taper
WHAT’S NEW FROM THE BLOG
[whats-new-patients]